The AR-15 is America’s most popular rifle, but cleaning it is not usually at the top of peoples’ lists of fun things to do. A lot of this has to do with a lack of knowledge or the lack of tools to properly clean the rifle.
Many shooters learned cleaning as a ritual in the military, but a majority of civilian shooters may have not. The following guide should help you on your way to cleaning your AR-15 after a shooting session.
AR-15 Cleaning Tools
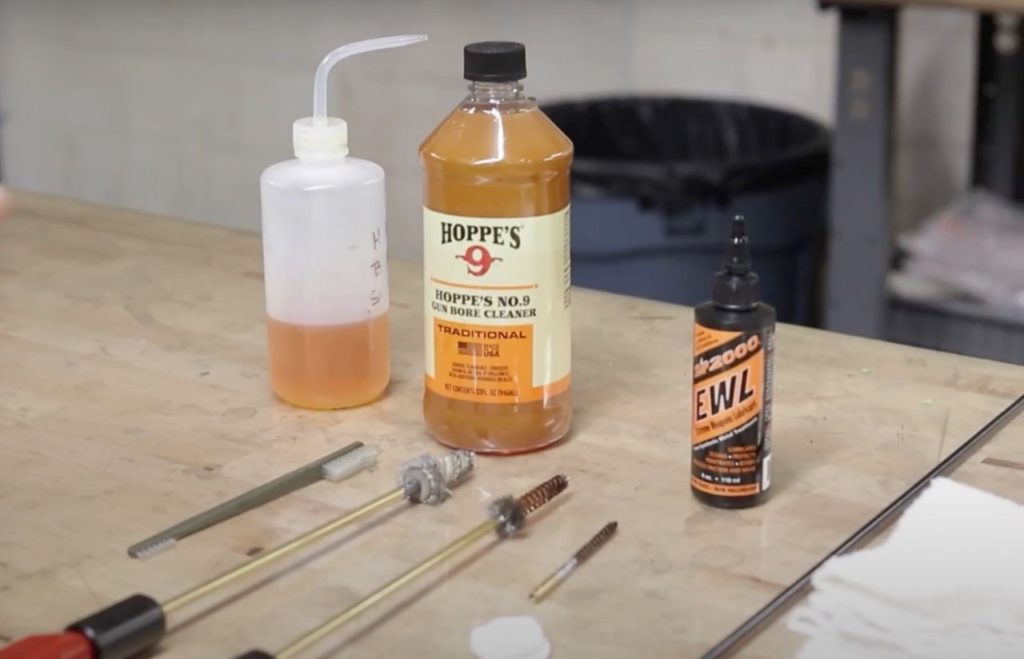
The proper tools to clean an AR-15 rifle, or pistol for that matter, are as follows:
• Cleaning rod or pull through cable or bore snake: this will guide the cleaning brush down the bore. It is recommended to use a one-piece cleaning rod as the segmented rods may damage the rifling. Two portions of a segmented cleaning rod can come in handy, however.
• Bore brush: A metal tip for the cleaning rod or cable that has metal bristles for scrubbing the bore.
• Chamber brush: Slightly thicker than a bore brush with a thicker base, a chamber brush is used for cleaning the rifle’s chamber.
• Chamber Mop: Similar to a chamber brush but made of cotton to help clean the chamber.
• All-purpose brush: A nylon bristled brush like an old tooth brush that is used for scrubbing external surfaces.
• Eyelet: The eyelet attaches to the tip of the cleaning rod or cable in order to facilitate cleaning and lubricating the bore.
• Cleaning patches: Cleaning patches fit into the eyelet for cleaning and lubrication.
• Scraper tool: This is a hardened piece of steel used to remove unusually large deposits of carbon from the bolt carrier.
• Q-Tips: For a fine level of cleaning on small parts.
• Pipe cleaners: These can be used to get into smaller areas where a Q-Tip will not fit.
• Cleaning rags: These are mostly used for external surfaces.
• Cleaning solvent
• Lubricating oil
Optional cleaning gear can include parts washers, ultrasonic cleaners, air compressors or even the laundry room sink if it is excessively dirty from a hunting trip. You can successfully clean your rifle using hot soapy water. Although this is usually for excessive field debris and not a typical shooting session. It is not uncommon for soldiers and Marines to take their rifles into the shower with them after a particularly long field exercise for this reason. Just make sure you dry it completely and lube it accordingly.
Disassemble the AR-15
Before you start, remove the magazine and ammunition. Pull the bolt to the rear and ensure that the chamber is empty. This will make for a completely safe cleaning procedure. After making sure the rifle is empty and free of ammunition, allow the bolt to go home.
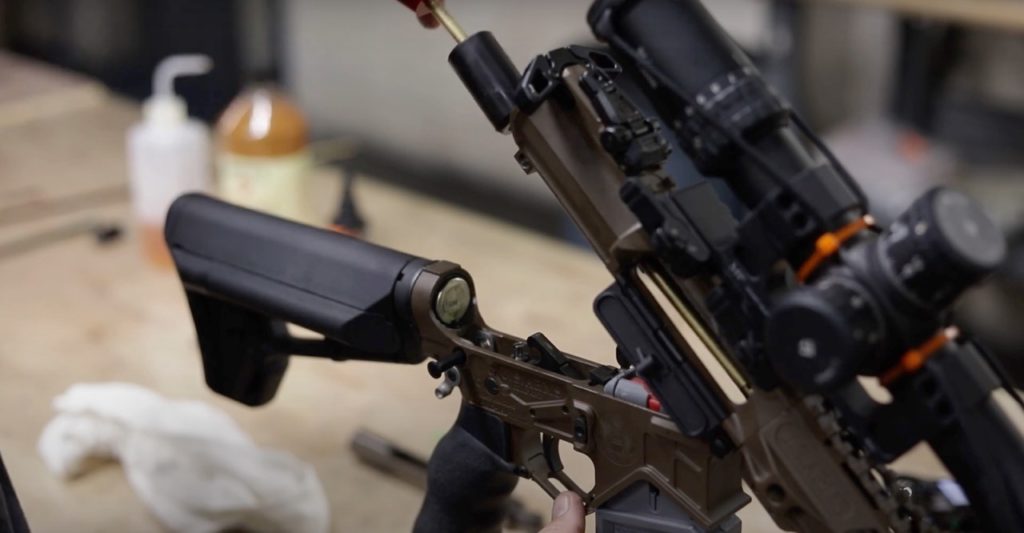
Push out the two receiver pins and separate the upper and lower receivers. Then pull back the charging handle and remove it with the bolt carrier group. It is always recommended to clean from the chamber to the muzzle as opposed to cleaning from the muzzle to the rear. This will protect the crown of the barrel from any damage.
First, use the chamber brush. Although we recommend a one-piece cleaning rod, in this case a segment of two of a segmented cleaning rod will help. Use a good cleaner such as Break Free and coat the brush lightly to help break up the carbon in the chamber. When it is loosened up, remove the chamber brush and attach the chamber mop to clean out any excess carbon from the chamber. Remove the chamber mop from the cleaning rod and attach the bore brush.
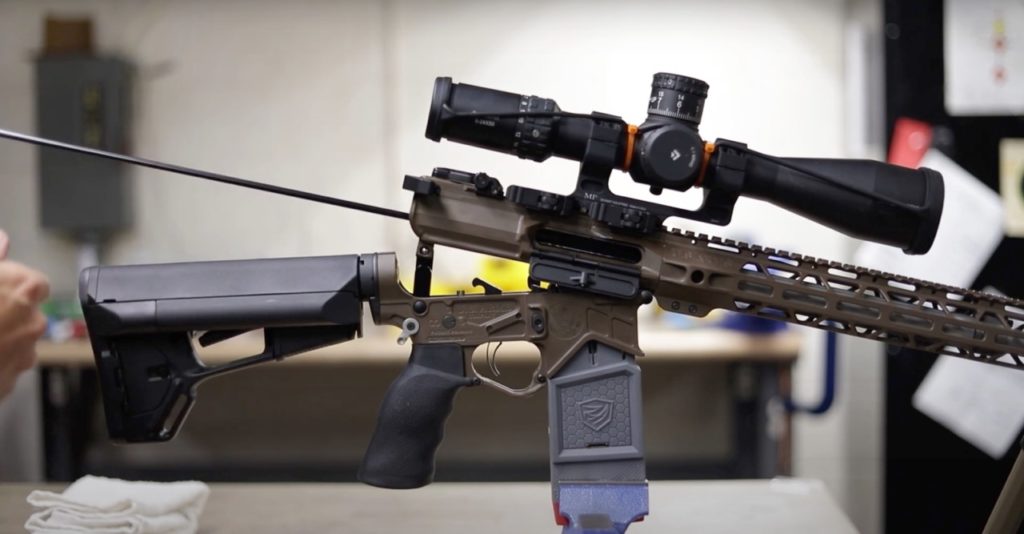
The bore brush is pushed through the bore several times to loosen any carbon or even copper fouling. It should have a light coating of Break Free or solvent as well.
Next, remove the bore brush and attach the eyelet with a cleaning patch lightly coated in Break Free. Push it through once and retract it. Follow this with a clean dry patch and repeat. Keep changing out the patch with every pass until a patch emerges clean and dry.
The muzzle device, whether it is a muzzle brake, compensator or flash suppressor may need attention, particularly if it acts as a quick detach mount for a sound suppressor. An all-purpose brush or the bore brush can be used to scrub it lightly. Flutes and holes can be cleaned with Q-Tips or pipe cleaners.
You can now turn your attention to the bolt carrier group. Some people merely put these parts in an ultrasonic cleaner, but for an old school cleaning job you will want to remove the firing pin retaining pin, which will allow the firing pin to drop out through the rear. Then remove the bolt from the carrier and use the tip of the firing pin to push out the extractor pin by the head of the bolt.
Start with an all-purpose brush lightly coated in Break Free and scrub all external surfaces. If carbon is still an issue, you can step it up with your bore brush and if it is still an issue follow that with the scraper tool. Q-Tips can be used to clean the bolt face and inside of the bolt. A pipe cleaner can be used to clean out the gas key as well.
Generally, you will not want to disassemble your lower receiver. An all-purpose brush can be used to scrub the outside, inside the magazine well and visually inspect the trigger group. Aerosol cleaners and an air compressor can be used to get any carbon in here.
Push down on the buffer detent and remove the buffer and action spring. This is best done by pushing down on the hammer and pulling the head of the buffer forward and over the hammer. The spring is pulled out next. These parts can be cleaned with the all-purpose brush and usually a rag.
Part of the cleaning process involves a visual inspection of all the parts of the rifle. Watch for pitting, possible cracks or wear in the components, etc. Be mindful of rust or corrosion on the steel parts. If any part looks suspect, consider replacing it or consult a gunsmith who can help you make that determination.
Once everything is clean and serviceable, you can lubricate the parts.
How to Lubricate AR-15 Components
Lubrication is important for a number of reasons. First of all is that it protects the rifle from corrosion and rust. Secondly is that it is important to guarantee safe operation and reliability for the next time you shoot it. Always go light as excessive oil or lubricant can attract dust or dirt.
A light coat of your lubricant of choice should be applied to a patch and run down the bore to lubricate it. Lightly soak a rag with lubricant and go over the parts of the bolt carrier group.
Apply the same lightly coated rag to the buffer and action spring to ensure that they are coated as well. You may want to add a drop of oil on the hammer and sear. Lastly, wipe down all the external components with the lightly coated rag.
Reassemble AR-15 Components
After all of the parts have been lightly lubricated, you can reassemble the rifle in the opposite order from disassembly. First, take the buffer and action spring and reinstall them into the butt stock. Work the spring in first followed by the buffer. You may have to push down on the hammer slightly to ensure the head of the buffer clears the buffer detent. Then, reattach the upper receiver to the lower receiver at the front takedown pin only. Next up, make sure the bolt carrier group is completely and correctly assembled. Then insert the bolt carrier group and charging handle into the upper receiver. After pushing the bolt carrier group fully forward, swing the upper receiver downward to engage the rear takedown pin and fully assemble the rifle.
Once it is completely assembled, you should perform an AR-15 function check. Typically, this is done in the military and goes a few steps longer to ensure that the full auto or burst nature of the fire control group is working correctly. A function check should be performed every time the rifle is taken apart and put back together. This is to ensure you have a properly functioning rifle and did not upset the balance on disassembly or reassembly.
Put the rifle on safe and pull the charging handle to the rear in order to retract the bolt. If you squeeze the trigger, the hammer should not fall. Send the bolt home and squeeze the trigger. Once again, the hammer should not fall.
Move the selector lever to the SEMI position. Squeeze the trigger, the hammer should drop this time.
If there is a problem with either mode, you will know right away.
U.S. Arms Company
U.S. Arms Company builds top of the line AR-15 rifles and pistols. Each and every one exceeds common milspec standards and as such, they have put together an excellent video tutorial to walk you through the assembly, disassembly, cleaning and lubrication steps as described above.
The video can be seen here: How to Clean an AR-15 with Josh Kent